How to Keep Characters Consistent Across Pages
Your hero is what makes a book feel personal. If John changes face between page three and page four, the spell breaks — and readers notice, even if they cannot say why. Keeping one character recognisable from the cover to the last scene is what AnyTale is built around, and this guide covers how to do it.
Why characters drift in most tools
In most AI tools, every image is generated from scratch. Ask twice for "a boy with red hair and a yellow raincoat" and you get two different boys who both technically match the description — different nose, different eyes, different face shape.
Over a twenty-page book, that turns your one hero into twenty near-strangers. It is the single biggest reason AI-made picture books look amateurish, and it is not something you can fix by writing a longer description.
How AnyTale solves it
You create a character once, and then place that same character on every page. John on page twelve is not a new generation that happens to resemble the cover — he is the same saved character, reused.
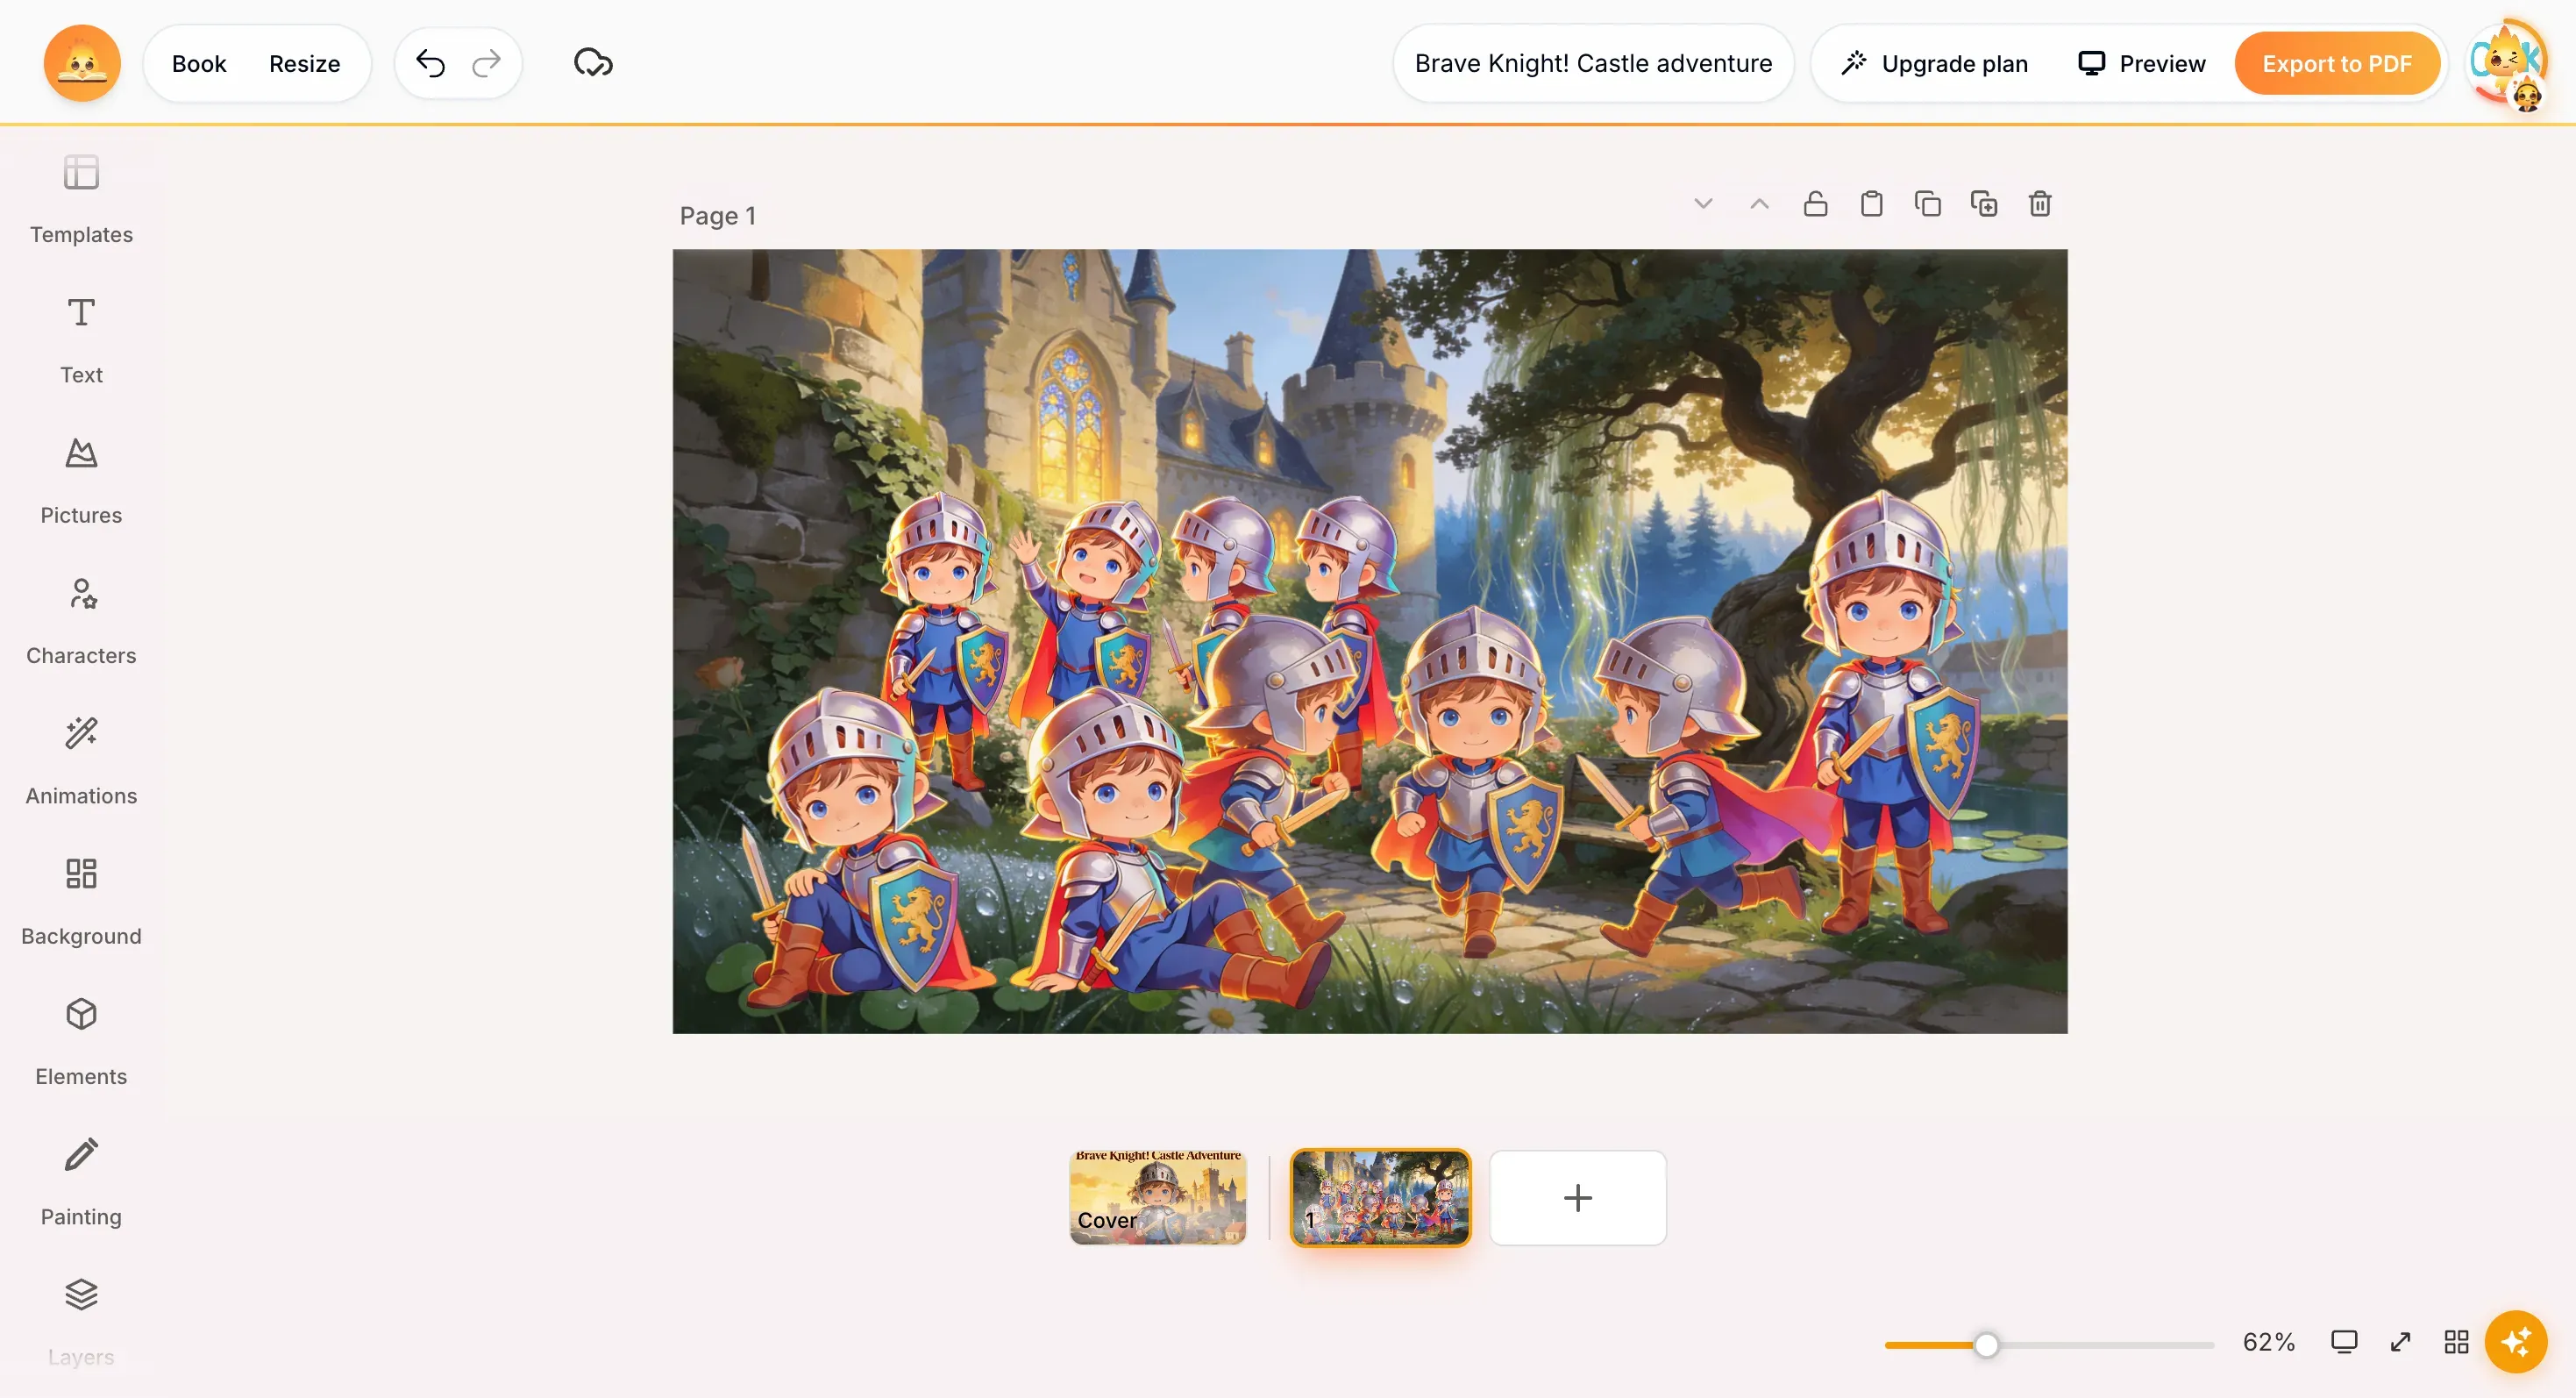
Every knight above is the same saved character. Different poses, different positions — one hero.
That difference is the whole trick, and it leads to one rule worth memorising:
Never re-describe your hero. Always reuse him.
| Do this | Not this |
|---|---|
| Open Characters and place your saved hero on the new page | Open Pictures and generate "a boy with red hair" again |
| Use Magic Characters to put the same hero in a new pose | Generate a brand-new character because this scene needs him sitting |
| Keep the illustration style you chose when you created the book | Switch style halfway through |
Placing the same character on a new page
Open the Characters tool on the left toolbar. Your cast lives here:
- Main characters — your book's leading cast, ready to drop onto any page.
- Recently used — whoever you placed last, for quick reuse.
- Generated characters — everything you have ever created in this book. This is the one you will use most.
Click a character to place it, then move and resize it to fit the scene. Scaling and repositioning never change who the character is — you are moving an existing character, not making a new one.
Changing pose without losing the face
A story needs your hero standing, sitting, running, sleeping. Generating each of those separately is exactly what breaks consistency. Magic Characters exists to avoid that: it regenerates the same character in a different pose.
- Place the character on the page and select it.
- Click Magic Characters in the toolbar that appears at the top. A side panel opens, already loaded with your character.
- Open Poses, pick a category (Women, Man, Girl, Boy, Animals) and a pose. Each category offers a Realism set and a Chibi set — Main, Standing, Sitting, Ground sitting, Running and two lying poses.
- Press Generate character.
The same hero reappears in the new pose: same face, same outfit, new position.
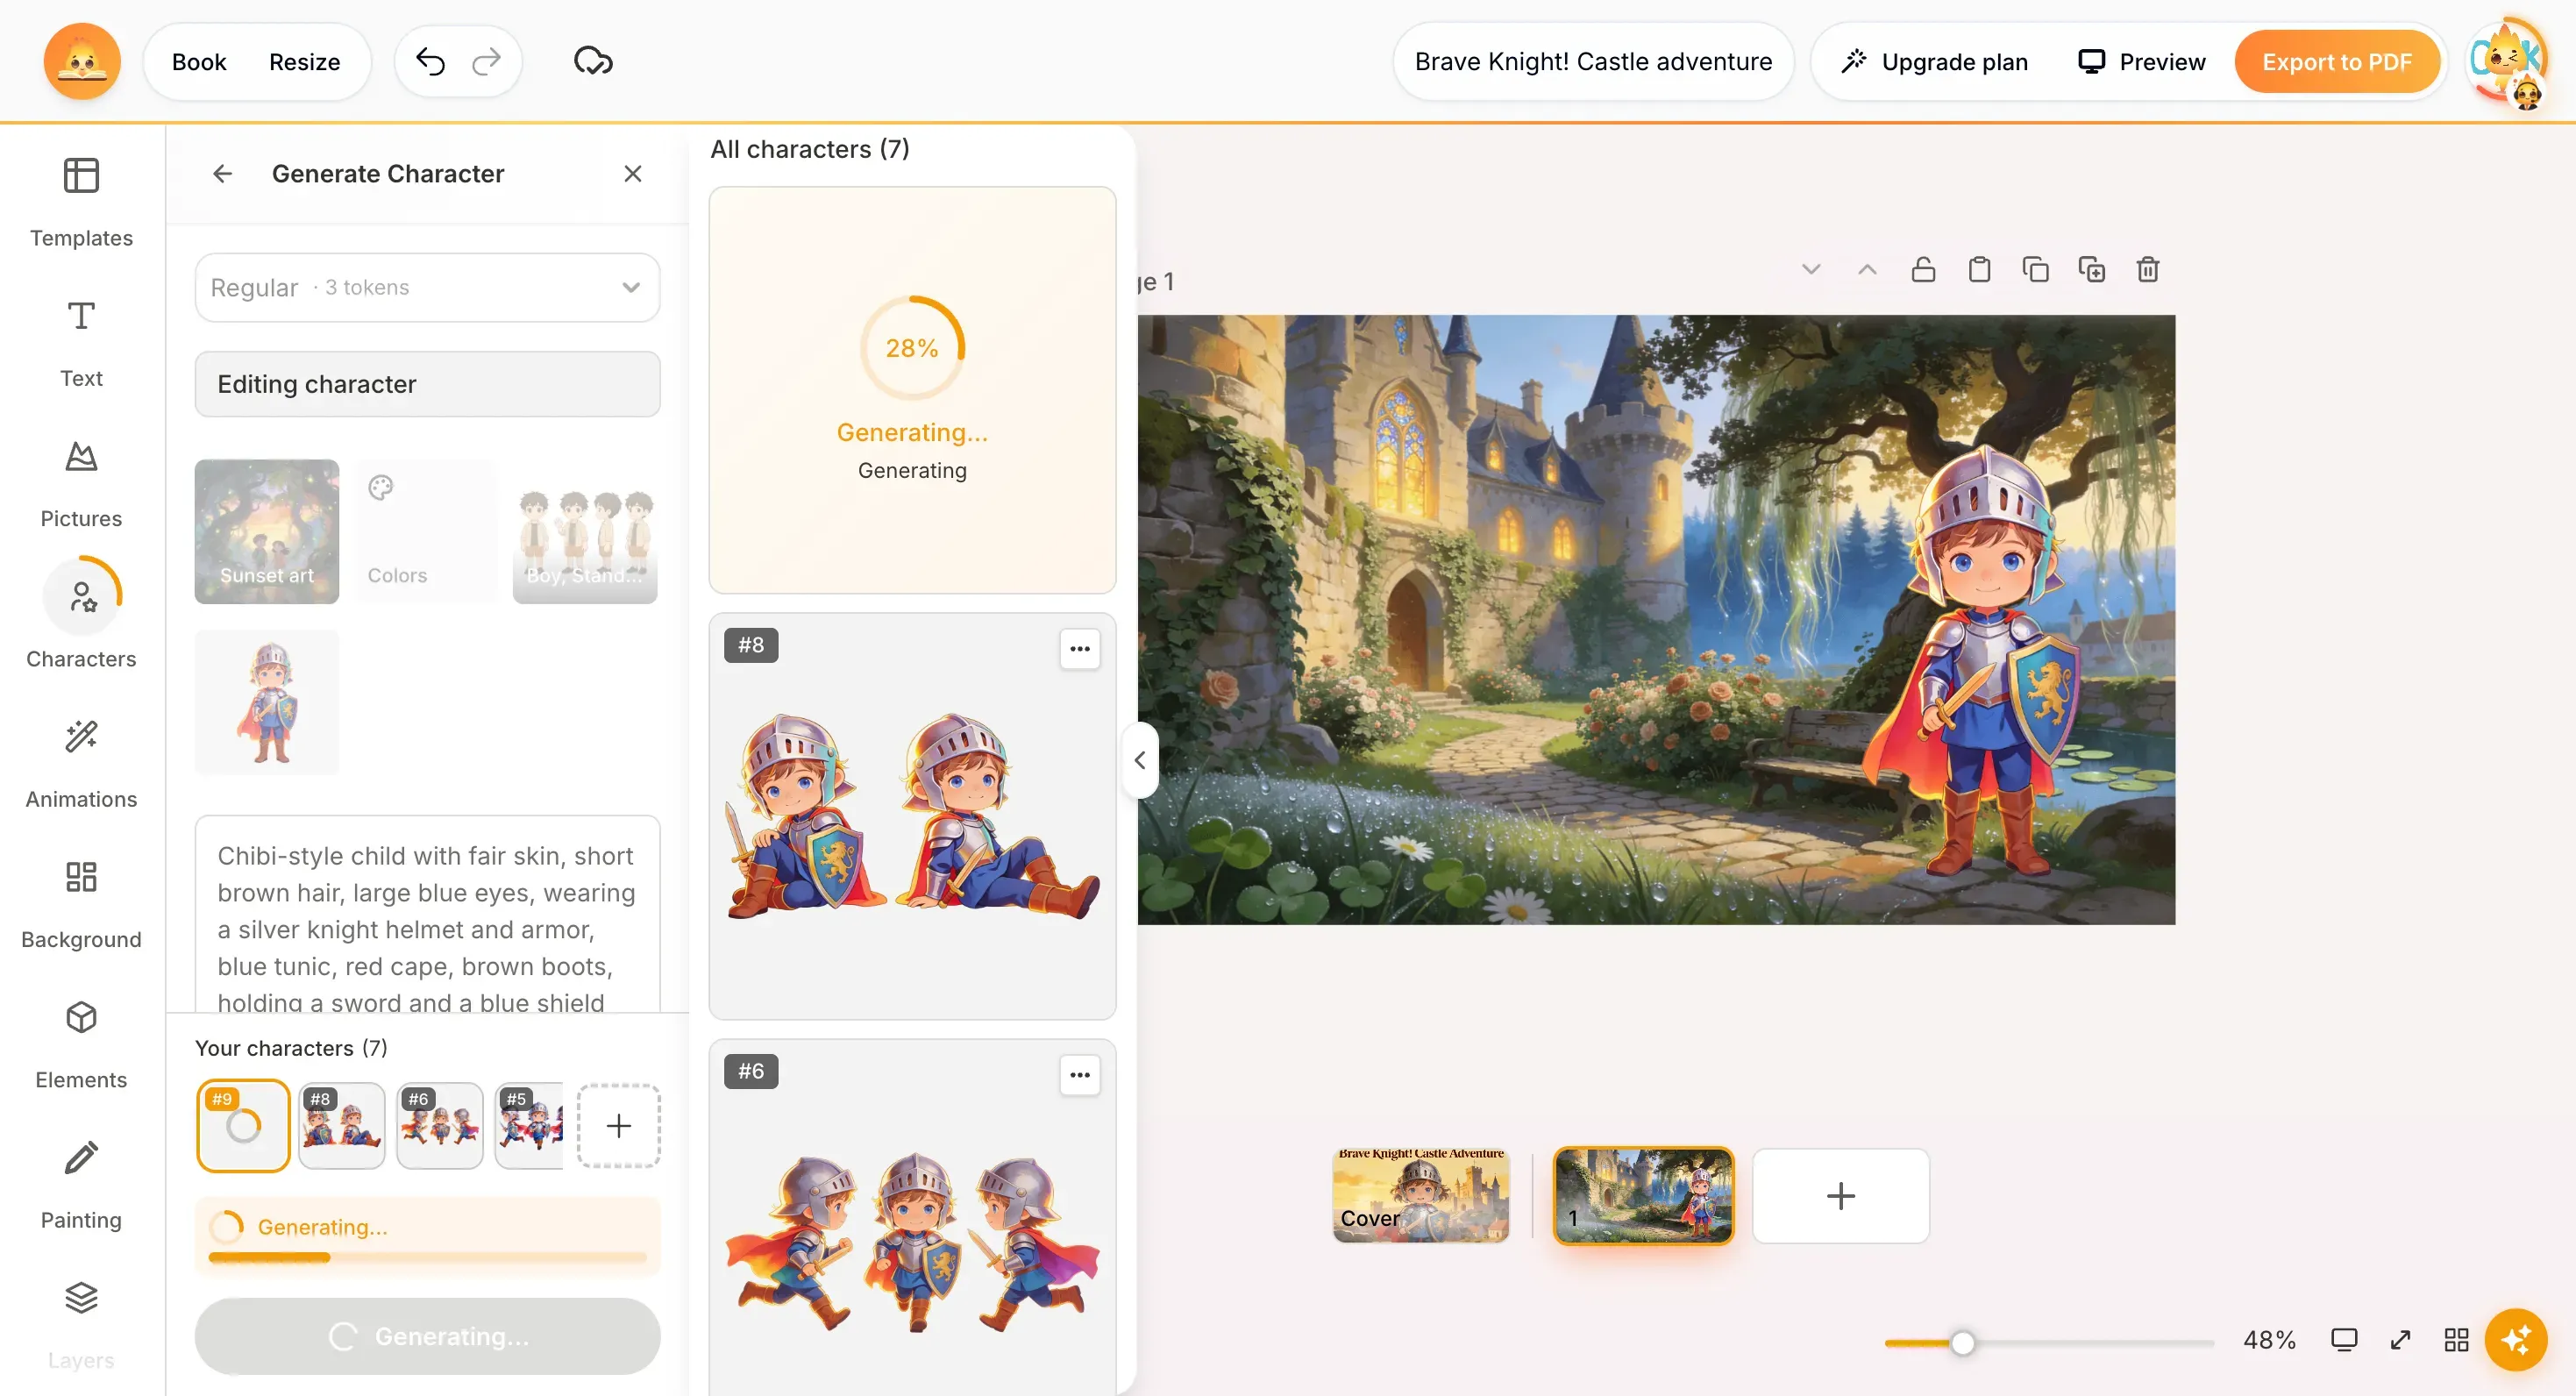
Two things to watch in that panel:
- Leave the description alone. It arrives pre-filled with your existing character's description — that text is what keeps the new pose on model. Rewriting it is the most common way people accidentally create a different child.
- Check the model and its cost. The model selector at the top shows the token price for the generation, so you know what a pose costs before you spend it.
Magic Characters sits next to Magic AI in the same toolbar, and they do different jobs. Magic Characters regenerates this character. Reach for it whenever the goal is the same hero in a new position.
Using a reference image
If you have a specific look in mind, upload a Reference image when creating or regenerating the character. The reference anchors the appearance far more tightly than words can — a description leaves room for interpretation, an image does not.
This is also how you base a hero on a real child. If you would rather not use original photos, the Avatar tool builds a character that resembles your child without using the photo itself. Once created, an avatar behaves like any other character — place it from Generated characters on every page.
Art style is half of consistency
A character can be perfectly consistent and the book can still feel disjointed if the drawing style shifts. Your book's illustration style — Artbook, Storybook, Playful Cartoon, Magic Tales, Watercolor, Cute Anime, Anime, Modern Graphic and more — is chosen when you create the book, and it keeps every illustration visually of a piece.
The Magic Characters panel shows the character's current style as the first tile, next to Colors and Poses. Keep it matching the book. A Storybook hero standing in an Anime scene reads as a mistake even to someone who could not name the problem.
When a character still looks off
| What you see | What usually happened |
|---|---|
| The face changed between two pages | A new character was generated instead of reusing the saved one. Delete it and place your hero from Generated characters. |
| The outfit or hair changed | The character was regenerated from a description rather than from itself. Use Magic Characters on the existing character instead. |
| Colours drift from page to page | Set Colors when generating, or add a Reference image to lock the palette. |
| The character looks pasted on top of the scene | Usually a background edge. Remove the character's background and match its scale to the page. |
| The character is there but invisible | It is behind the background or another element. Open Layers and move it forward. |
Tip: Build your whole cast before you start laying out pages. Generating John, his friend and the owl up front — all in the same illustration style, in one sitting — gives you a consistent set to draw from, instead of inventing a new character every time the story needs one.
Share this article
Need help? Have a question? Chat with our team — we're happy to help.